What’s The Project About?
Automatic Image Privacy Enhancement For Secure Sharing.
GitHub Link: github.com/vedangwartikar/img-privacy/
Overview
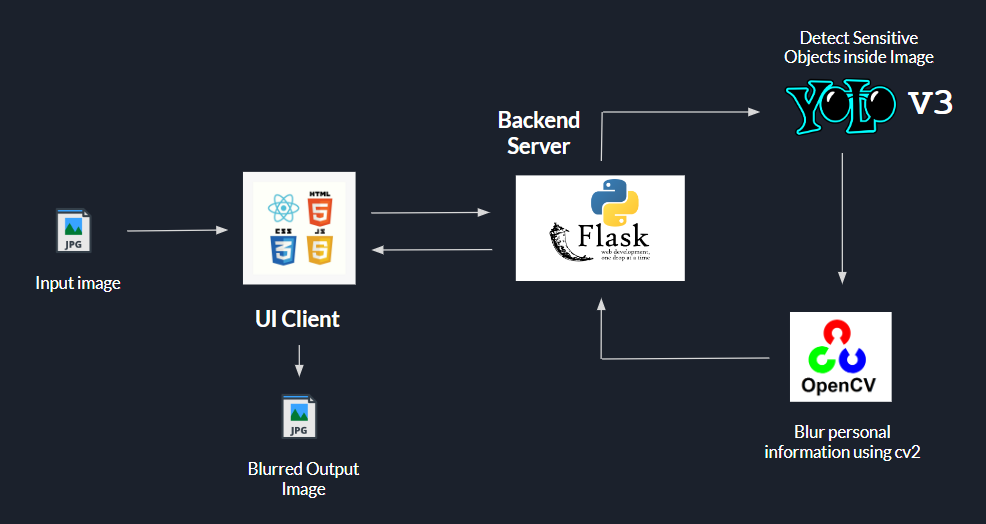
This project aims to address the prevalent issue of privacy vulnerabilities associated with sharing images online. The project aims to develop a robust system capable of protecting individuals’ privacy while sharing images online. By implementing advanced algorithms and techniques, the system will effectively detect and blur out sensitive details, thus minimizing the potential for misuse of personal information. The application uses a Python Flask backend server to detect objects with YOLOv3 and blurring sensitive information using OpenCV. The system architecture includes a UI client that sends input images to the Flask backend. Object detection is performed on the backend, and the processed image with blurred objects is sent back to the UI client.
System Architecture

Setup
Backend Server
Inside the server/ directory, create a virtual environment for the backend code
pip install virtualenvvirtualenv flask_envcd flask_env
# For Linux and MacOSsource bin/activate
# For WindowsScripts\activate
Install the required Python packages using pip.
pip install flask flask_cors requests Pillow torch torchvision opencv-pythonCopy the YOLOv3 object detection weights file to the src/ directory
Run the Flask application.
python src/app.pyThe Flask application will be listening at the http://localhost:5000
UI Client
After installing Node.js, run the below steps inside the client/ directory to setup the UI client
npm installnpm run devThe UI client will be available at http://localhost:5173
Website Usage
- Drag and drop an image to the box or click on the Click to browse file text to select an image from the system
- After selecting an image, click on the Upload Image button
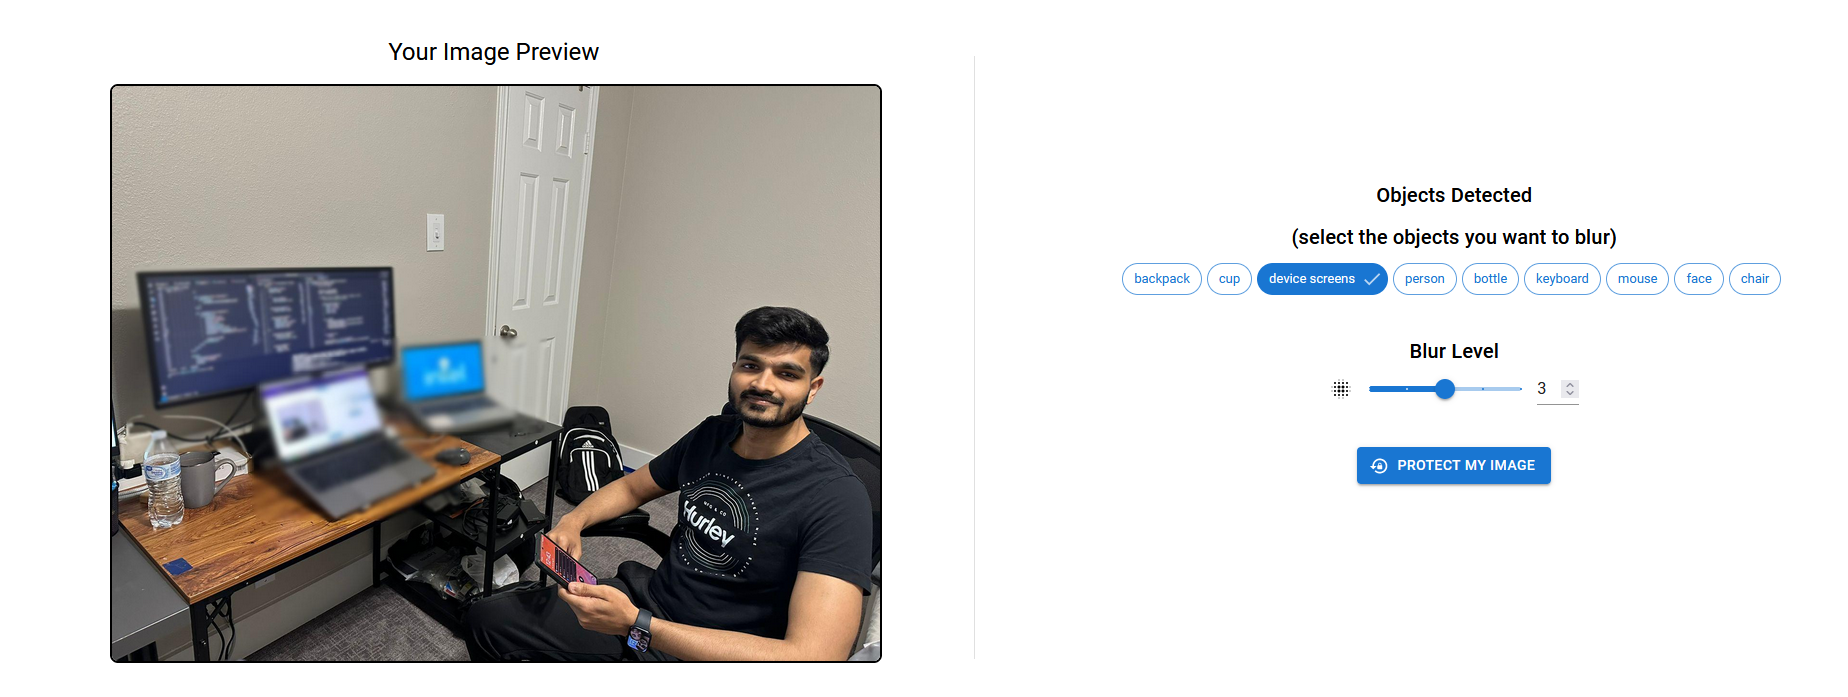
- Preview will be available on the left, and on the right, you will see the Object detected in the image
- You can select the particular objects you want to blur and select the blur level (1-5)
- Then click on Protect my Image button to apply the filters and blur the image (preview visible on the left)
- Finally, click on the Download Image button to download the output image
Below is an example of how the output image will look like once the sensitive information has been hidden -

Feel free to contribute through a PR or report any issues here.